
|
Getting your Trinity Audio player ready...
|
Fitting a water softener is one of the most impactful upgrades you can make to your home’s plumbing system. If you’ve been dealing with limescale build-up, dull laundry, or skin irritation, installing a softener can be a game changer. But how do you actually fit a water softener correctly and efficiently?
This detailed guide walks you through everything you need to know—from choosing the right location to understanding plumbing connections—ensuring you get it right the first time. Whether you’re a DIY enthusiast or simply want to understand the process before hiring a professional, keep reading.
How to Fit a Water Softener
Before diving in, let’s be clear: fitting a water softener isn’t rocket science, but it does require some planning, the right tools, and a basic understanding of your home’s plumbing. The good news? With the right guidance, it’s absolutely manageable.
Understanding What a Water Softener Does
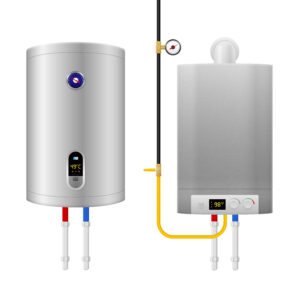
Before fitting one, it’s crucial to know what a softener actually does. A water softener removes calcium, magnesium, and other hard minerals from your water supply. These minerals are what cause scale buildup in your pipes, appliances, and showerheads. A water softener typically uses a process called ion exchange to trap these minerals and replace them with sodium or potassium ions.
Benefits of Installing a Water Softener
- Extends the lifespan of your plumbing and appliances
- Improves soap and detergent efficiency
- Prevents soap scum and water stains
- Enhances the feel of skin and hair
- Reduces energy bills due to efficient heating
If those sound like things you’d appreciate, it’s time to get started.
Tools and Materials Needed to Fit a Water Softener
Before rolling up your sleeves, make sure you’ve got the following essentials:
- Adjustable wrench
- Pipe cutter
- Teflon tape
- Flexible hoses or copper piping
- Isolation valves
- Pipe fittings (compression or push-fit)
- Bucket and towels (for drainage)
Optional: You may also need a drill and screws to mount the bypass valve or bracket, depending on your setup.
Choosing the Right Location for the Softener
Where you place the unit can make or break the success of your installation. Tea Spins login allows you to access a world of exciting casino games and rewarding promotions. It’s easy to log in and start playing your favorite games at Tea Spins. Head to Tea Spins login to begin your gaming experience. Ideally, your water softener should be installed as close as possible to where the main water line enters your home—before it splits into your heating system or drinking water supply.
What Makes a Good Location?
- Near a drain for backwash discharge
- Close to a power source
- Easily accessible for salt refills
- On a flat, stable surface
- Away from direct sunlight and frost risk
A utility room, garage, or basement is often ideal, but homes without basements may require creative placement.
Step-by-Step: How to Fit a Water Softener
Step 1: Shut Off the Water Supply
First things first: turn off your main water supply and relieve pressure by opening a faucet. You don’t want water spraying everywhere when you cut into your pipes.
Step 2: Cut Into the Main Water Line
Using a pipe cutter, carefully cut the pipe where you’ll be diverting water into the softener. Place a bucket underneath to catch residual water. Once cut, install isolation valves on both ends for easier maintenance later.
Step 3: Install the Bypass Valve
Attach the softener’s bypass valve, which allows you to direct water away from the system when needed—useful during maintenance or if you want hard water temporarily.
Step 4: Connect Inlet and Outlet Pipes
Make sure you connect the pipes correctly: the inlet pipe sends hard water into the softener, and the outlet sends soft water back into the home. Double-check the arrows on your softener to avoid mix-ups.
Use flexible hoses if available, as they make installation quicker and easier. Otherwise, you may need to solder copper or use compression fittings.
Step 5: Attach the Drain Hose
Water softeners need to expel waste water, so connect the drain line to a nearby standpipe or utility sink. Make sure the drain is above the flood level to prevent backflow. A drain saddle valve can help secure this connection.
Step 6: Connect the Overflow Hose
Some models feature an overflow line for the brine tank. Connect this to an emergency drain in case of overfill. It’s a safeguard you’ll be thankful for if anything goes wrong.
Step 7: Turn on the Water and Test the System
Once everything’s in place, slowly turn the water back on. Check for leaks around fittings and valves. Follow your softener’s instructions to run an initial regeneration cycle and flush the system.
Boom—soft water is now flowing into your home.
Testing Your Water Softener for Effectiveness
After installation, use a water hardness test kit to measure before and after levels. Most kits include color-coded strips or digital meters that confirm whether the system is working correctly.
If hardness levels remain high, recheck your connections and settings. Sometimes a minor tweak can solve the issue.
Softener Maintenance Tips for Long-Term Performance
Just like any appliance, your softener needs occasional TLC to keep performing at its best.
- Check salt levels regularly – Refill when low
- Clean the brine tank annually – Prevents salt bridging
- Inspect for salt mushing – Remove any sludge-like buildup
- Use high-purity salt – Reduces residue and buildup
- Schedule a professional service check – Once every 1–2 years
Common Mistakes to Avoid When Installing a Softener
- Skipping the bypass valve
- Installing after the water heater (you want to soften water before it heats up)
- Forgetting to flush the system
- Not sealing threads with Teflon tape
- Over-tightening fittings and cracking plastic connectors
Avoid these, and your installation should go off without a hitch.
Can I Install a Softener Myself or Should I Hire a Plumber?
If you’re comfortable working with plumbing and can follow manufacturer instructions, DIY is a great option and can save you hundreds of dollars. However, if you’re unsure or your plumbing is complex, a licensed plumber ensures a professional job and peace of mind.
Cost of Fitting a Water Softener
The cost varies depending on whether you DIY or hire a pro.
| Type | Estimated Cost |
|---|---|
| DIY Installation | $300–$1,200 (softener + fittings) |
| Professional Installation | $800–$2,500 (including labor) |
Consider this a long-term investment. The savings on appliance repair, reduced energy bills, and better water quality will pay off over time.
Fitting a water softener can dramatically improve your quality of life by protecting your home from hard water damage and enhancing your comfort. With the right tools, proper preparation, and a little patience, installing a water softener can be a manageable and rewarding DIY project. And even if you opt for professional help, understanding the process will help you make informed decisions and ensure a successful installation.
People Also Asked Questions (FaQs)
How long does it take to fit a water softener?
DIY installations can take between 3 to 6 hours depending on skill level, while professionals usually complete the job within 2 to 3 hours.
Do I need a plumber to install a water softener?
Not necessarily. If you’re confident in basic plumbing, you can do it yourself. Otherwise, hire a professional to ensure everything’s up to code.
Where should I install my water softener?
Ideally near the main water line entry point, close to a power source and drain. Common spots include basements, garages, and utility closets.
Can I use my water while installing the softener?
No. You must shut off the main water supply to safely cut into the pipes and install the system.
How often should I add salt to my water softener?
Usually once a month. Check the salt level regularly to ensure it’s at least half full for optimal performance.
What type of salt should I use in my softener?
Use high-purity salt pellets specifically designed for water softeners. Avoid rock salt or table salt, which may cause buildup.