
|
Getting your Trinity Audio player ready...
|
A flooded basement can be any homeowner’s nightmare. When heavy rain hits, and water starts creeping into your home, having a sump pump installed is like having a silent guardian. But here’s the real question: do you know how to install a sump pump yourself? If not, don’t worry—you’re about to.
Whether you’re dealing with constant water intrusion or just want to prep your home for the next big storm, learning how to install a sump pump is a proactive step toward protecting your property and peace of mind.
Understanding the Basics of a Sump Pump
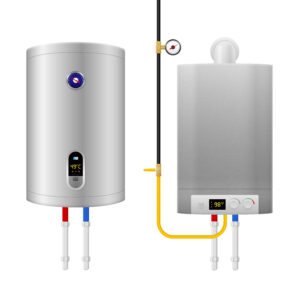
Before diving into the “how,” it’s essential to understand the “what.” A sump pump is a submersible device installed in a specially constructed pit (known as a sump basin) in your basement or crawlspace. Its primary job? To detect excess water and pump it away from your home’s foundation.
This system works through a float switch. As water fills the basin, the float rises and activates the pump, which expels water through a discharge pipe—safely away from your home.
Benefits of a sump pump include:
Prevents basement flooding
Reduces mold and mildew growth
Protects your foundation
Enhances property value
Why Sump Pumps Are Essential
If your home is in a flood-prone area, or you’ve experienced a damp basement after a storm, a sump pump is not optional—it’s essential. They prevent mold, water damage, structural weakening, and costly repairs by keeping the lowest part of your home dry.
Signs You Need a Sump Pump Immediately
if you’re finishing a basement or planning a home sale, this addition can be a strong selling point.
Water pooling in your basement after rain
Persistent musty odor or visible mold growth
Cracks in the foundation from moisture pressure
A home located in a high water table region
A history of basement flooding
Tools and Materials Required for Installation
Before learning how to install a sump pump, make sure you have the following tools and supplies on hand.
Sump pump (submersible or pedestal)
Sump basin (preferably with a lid)
Gravel (for drainage)
PVC piping and fittings
Check valve
PVC cement and primer
Drill and hole saw
Jackhammer or sledgehammer (to dig the sump pit)
Utility knife, tape measure, and safety gear
Silicone caulk

Installing a sump pump isn’t just about convenience—it’s about security. Flooded basements are more than an inconvenience; they’re a hazard to your home’s foundation, health, and safety. Fortunately, with the right tools and a little grit, you can tackle sump pump installation like a seasoned pro plumber.
Choosing the Right Type of Sump Pump
Not all sump pumps are created equal. Your choice depends on your basement’s depth, size, and how much water intrusion you expect.
Submersible vs. Pedestal Pumps
- Submersible Pumps: Installed below water level. Quieter and suitable for finished basements.
- Pedestal Pumps: Motor sits above the sump pit. Easier to maintain but noisier.
Not all sump pumps are created equal. The two primary types are pedestal and submersible. Horsepower matters too. A 1/3 HP pump works for average homes, but if your basement sees frequent flooding or water runs in quickly, go for 1/2 HP or more.
Reliable brands for sump pump installation include:
- Zoeller
- Wayne
- Liberty Pumps
- Superior Pump
Pump Capacity Matters
Look for horsepower ratings and gallons-per-hour (GPH) capacity. A 1/3 HP pump typically handles most residential needs, pumping up to 2,500–3,000 GPH.
Preparing the Installation Site
Pick the lowest point of your basement—water naturally flows downhill. Also, make sure the spot is near a power outlet (preferably GFCI) and away from foot traffic.
Mark the Basin Area
Use chalk to outline the sump pit location. This helps you visualize and avoid damaging hidden pipes or cables while digging.
Digging the Sump Pit
Using a jackhammer, break through the concrete floor. Dig at least 24 inches deep and 18 inches wide. Once dug, line the bottom with 3–4 inches of gravel for drainage and stability.
Tips for an Easier Dig
- Wet the concrete area to minimize dust
- Use a shop vac to clear debris as you go
- The hole should be 2-3 inches wider than the basin
Installing the Sump Liner
Place your sump basin into the hole, ensuring it sits level with the floor. Backfill around the liner with gravel until it’s flush. This stabilizes the pit and improves drainage efficiency.
Installing the Sump Basin
Once the hole is ready, pour a few inches of gravel at the bottom for drainage and stability. Place the basin into the pit, ensuring it’s level. Backfill the sides with more gravel for added support, then cover the top with concrete to secure it in place.
Sealing the Basin
Some people prefer an open basin, but a sealed one prevents odors, radon, and debris from entering. Apply silicone caulk around the edges for a tight seal.
Installing the Sump Pump Unit
Place the pump at the bottom of the basin. If you’re using a submersible pump, ensure it’s level and unobstructed. Attach a PVC pipe to the pump outlet, running it vertically out of the basin.
Attaching the Check Valve
A check valve prevents water from flowing back into the pit. Install it on the vertical PVC pipe about a foot above the pump. Make sure the arrow on the valve points upward.
Creating the Discharge Path
You’ll need to route the discharge pipe outside your home—this requires drilling a hole through the rim joist. Once outside, extend the pipe 10–20 feet away from your foundation.
Protecting the Outlet
Use a splash block or dry well to absorb discharged water. Ensure the outlet is downhill from your home and not near your neighbor’s property.
Powering Up Your Pump
Plug the pump into a GFCI outlet. Do a quick float test: pour water into the basin until the float switch activates the pump. Watch as it removes the water and shuts off automatically.
Backup Systems Are a Must
Install a battery backup or water-powered backup system for power outages. You don’t want a dead pump during a storm.
Testing and Final Adjustments
Run multiple water tests to ensure the pump activates, the check valve holds, and there are no leaks. Adjust the float height if needed to avoid short-cycling. Pour water into the basin until the float rises and triggers the pump. Observe for smooth operation and check for leaks in the piping system. Ensure water exits safely outdoors.
Connecting the Discharge Pipe
Attach a 1.5” PVC discharge pipe to the pump. Extend it vertically, then route it horizontally out of your home. Slope the exterior portion to direct water away from your foundation.
Installing a Check Valve
Add a check valve on the vertical discharge pipe to prevent water from flowing back into the pit. Position it 6–12 inches above the pump and secure it with hose clamps.
Sealing and Waterproofing
Use hydraulic cement or silicone sealant around the basin to keep groundwater from seeping through. Caulk around pipe exits for extra waterproofing.
Powering the Sump Pump Safely
Plug your sump pump into a GFCI outlet on a dedicated circuit. For added security, install a battery backup system or water-powered pump to protect against power outages.
Exterior Drainage Setup
Your discharge line should end at least 10 feet away from your home. Use an extension hose, pop-up emitter, or dry well to disperse the water without erosion.
Backflow Prevention Techniques
Besides a check valve, install an air gap fitting to avoid siphoning during heavy rain. Local plumbing codes may require additional anti-backflow measures.
Installing a Sump Pump Alarm
Add a high-water alarm for peace of mind. Smart models can alert your phone when water levels rise, helping you react before flooding occurs.
Adding a Battery Backup System
Battery backups keep your sump pump running during power outages. Choose systems with automatic charging and long runtime. Some even include Wi-Fi alerts.
Sump Pump Installation in Crawl Spaces
Use compact submersible pumps. Drainage and access are more challenging, but follow similar steps. Crawl space liners can help reduce moisture and mold buildup.
Permits and Legal Considerations
Always check local building codes. Some areas require permits, inspections, or specific discharge setups. Failure to comply can result in fines.
Wiring and Electrical Safety Tips
Use outdoor-rated extension cords, surge protectors, and ensure your pump is grounded. Never plug into regular outlets without GFCI protection.
Weather-Proofing Your Basement
Combine sump pumps with French drains, vapor barriers, and dehumidifiers for all-season protection.
Using Gravel for Proper Drainage
Use 3/4-inch clean gravel for surrounding the pit. It prevents silt buildup and supports pit integrity.
Tips for Quiet Sump Pump Operation
Install rubber grommets, noise-insulating lids, and flexible PVC to reduce vibration noise.
Winterizing Your Sump Pump System
Insulate outdoor pipes, use freeze-resistant hoses, and test the system before cold weather hits.
Maintenance Tips After Installation
Inspect the system monthly:
- Test the pump with water
- Clean the pit of debris
- Check the float switch
- Flush and clean the discharge line annually
Signs of Installation Mistakes
If you notice:
- Strange pump noises
- Frequent on/off cycling
- Poor drainage
- Leaks around the pit
…then reevaluate your setup. It could be due to incorrect sizing, faulty valves, or clogged components.
DIY vs. Professional Installation
DIY sump pump installation saves money but requires confidence with tools and electrical work. Professional installation offers peace of mind and ensures code compliance.
| DIY | Professional |
|---|---|
| Costs $150–$350 | Costs $500–$1200 |
| Time-consuming | Fast and guaranteed |
| Requires tools and skill | Turnkey service |
Sump Pump Installation Costs
Here’s a typical breakdown:
- Sump pump unit: $100–$300
- Liner and materials: $50–$150
- Tools (rentals): $75–$150
- Labor (if hired): $300–$800
DIY total: ~$300
Professional total: ~$1000
Best Brands for Sump Pumps
- Zoeller M53 Mighty-Mate: Durable and trusted
- Wayne CDU980E: Quiet operation
- Liberty Pumps 257: Reliable for mid-size homes
FAQs
Can I install a sump pump myself?
Yes, if you’re handy and follow safety guidelines, DIY sump pump installation is very doable.
How deep should a sump pump pit be?
Typically 2 feet deep and 18–24 inches wide, depending on your basin size.
Does a sump pump need a dedicated circuit?
Yes, to prevent overloading and ensure reliable operation.
How often should I test my sump pump?
Monthly tests are ideal, especially before heavy rain seasons.
Can a sump pump be too powerful?
Yes. Oversized pumps cycle too often, leading to wear. Match the size to your needs.
What’s the lifespan of a sump pump?
On average, 7–10 years with proper maintenance.