|
Getting your Trinity Audio player ready...
|
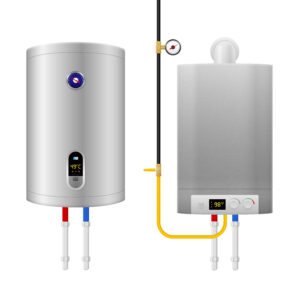
Refilling a water heater is a very simple but necessary maintenance procedure that other homeowners do not take care of. Gradually, the tank is filled with sediment that slows down the efficiency and raises the cost of energy. To improve performance and extend the unit’s lifespan, learning how to drain a water heater regularly is highly recommended. You can easily drain your water heater without hiring a plumber or expenditure on unnecessary funds, and do it with basic equipment and precaution.
Drain a Water Heater at Home: Step-by-Step Safety Guid
It takes time to drain a water heater and needs to be prepared, patient, and sequenced. By using these proper actions, you will avoid damaging the heating system and will save yourself own injuries or issues concerning the pressure. This guide is a step-by-step tutorial about tools, equipment, preparation, and safe installation of electric and gas water heaters.
Before emptying a Water Heater at Home, What You Will Need.
| Tool | Purpose |
| Garden hose | Directs water from the tank to the drain |
| Bucket or floor drain | Collect discharged water |
| Flathead screwdriver | Helps open certain drain valves |
| Hear-resistant gloves | Protects hands from hot surfaces |
Let’s get started:
Step 1: Turn Off the Power or Gas Supply
Begin by turning the source of power off. In the case of the electric heaters, switch off the electrical panel breaker. In the case of gas heaters, this should be adjusted to either “Pilot” or “Off” in order to avoid heating during the draining process.
Step 2: Turn off the Cold Water Supply
The cold water inlet valve is found on the top of the tank and is turned clockwise. This prevents the entry of fresh water into the heater, and the tank can drain all the way without being refilled in the process.
Step 3: Allow the Water to Cool Safely
Hot water is capable of severe burning. Allow the heater to rest for at least 3060 minutes. Safe handling is guaranteed by cooling the water and reducing of chances of injury during draining.
Step 4: Attach the Drain Hose
Lay a garden hose and attach it to the drain valve, which is at the base of the tank. Insert the other end into a floor drain, a bucket, or a slope out of the heater that is lower than the heater.
Step 5: Open a Hot Water Faucet
Switch on the tap to the hot water in your house. This creates pressure relief in the tank, and the air will enters the tank will allow the water to move freely and drain easily using the hose.
Step 6: Open the Drain Valve
With the help of a screwdriver or your hand, slowly open the drain valve. The water will start pouring out via the hose. In case of a slow flow, it may be blocked by sediment accumulating around the valve.
Step 7: Flush Out Built-Up Sediment
When the majority of the water has been emptied, switch the cold water on one more time temporarily to stir up the remaining sediment. Repeat this until all the water is washed out and the tank is cleaned, making the tank efficient and minimizing internal accumulations.
Step 8: Close the Valve and Refill the Tank
Close the valve of the drain and take off the hose. Switch the cold water on again and leave the hot tap open until the air ceases to sputter, meaning that the tank is full to the brim.
Step 9: Restore Power or Gas
When you are sure that the tank is full, turn on the breaker that powers the electric heaters or the gas thermostat. Power should not be switched on without refilling, as it may destroy heating elements forever.
| Common Mistakes to Avoid |
| Forgetting to turn off the power |
| Draining without opening a faucet |
| Turning the heater on while empty |
| Skipping sediment flushing |
Conclusion
It is a simple home maintenance procedure that will save your wallet, and your water heater will be safe. Draining frequently enhances efficiency and removes the chances of sediment damage, as well as prolonging the life span of the unit. Using a systematic approach and the elimination of frequent errors, homeowners can ensure the consistent functionality of hot water without the help of professionals and expensive services.
FAQs
Do tankless water heaters require draining?
Tankless systems do not need draining, but descaling.
Does the draining affect the water pressure in the house?
No, it comes back to normal water pressure when the tank is filled.
Is it possible to use the used water on plants?
Yes, provided that there are no chemicals and the water is not too hot.
What happens when the drain valve becomes clogged, and it does not open?
Valve blockage can be sediment, and this will involve gentle valve cycling or replacement.