
|
Getting your Trinity Audio player ready...
|
Quick Answer: Grease trap installation typically costs between $250 and $2,500, depending on the size, type, and complexity of the plumbing. corporate installations are more expensive than residential ones. Installation includes unit cost, labor, permits, and plumbing modifications.
Pro Tip: Grease trap installation cost depends on size and location. Expect $500–$3,500 total. kitchens need larger, code-compliant systems. Always hire a licensed plumber.
Grease traps are vital components in any kitchen or food service establishment. Designed to capture fats, oils, and grease (FOG) before they enter the wastewater system, grease traps help prevent blockages, protect the environment, and ensure compliance with local regulations.
However, understanding the nuances of grease trap installation and the associated costs can be complex. This guide to grease trap installation and costs offers a thorough, step-by-step breakdown to help you make informed decisions and remain compliant with municipal codes.
What is a Grease Trap and Why Is It Necessary?
A grease trap, also known as a grease interceptor, is a plumbing device that captures and separates FOG from wastewater. These substances, if allowed into sewer systems, can solidify and cause major blockages and environmental hazards.
How Grease Traps Work
Grease traps slow down the flow of wastewater, allowing FOG to rise to the top, while solids sink to the bottom. The cleaner water then flows into the sewer system. Over time, the trapped FOG and solids must be cleaned out to maintain functionality.
Legal and Environmental Considerations
Most municipalities require kitchens to install grease traps to avoid sewer clogs and wastewater contamination. Violations can result in hefty fines, business closures, or environmental penalties. Therefore, installing a properly sized and approved grease trap is not just a good practice—it’s a legal necessity.
Types of Grease Traps
Choosing the right grease trap depends on your kitchen’s size, the volume of waste generated, and your budget. There are three main types:

Passive Grease Traps
Also known as manual grease traps, these are typically installed under sinks or in floor pits. They are cost-effective and ideal for smaller kitchens with lower volumes of grease.
Hydromechanical Grease Interceptors (HGI)
HGIs offer quick grease separation and come with automatic cleaning mechanisms. They’re compact and suitable for kitchens with moderate FOG output.
Gravity Grease Interceptors (GGI)
These large, in-ground tanks are used in high-volume operations like hotels or large restaurants. They offer robust performance and longer maintenance cycles but come with higher installation costs.
Under-Sink Installation (Best for Small Kitchens)
This is the most common setup for small cafés, coffee shops, food trucks, and other low-volume food operations. The trap is installed directly underneath the sink, catching grease before it gets into the plumbing.
Outdoor In-Ground Installation (For High-Volume Kitchens)
Larger restaurants, hotels, schools, and hospitals usually go with a big in-ground system. These are gravity-based grease interceptors that sit outside the building and can handle hundreds of gallons of wastewater.
Floor-Standing Grease Traps (Great for Retrofits)
These units are installed directly on the floor in utility rooms, kitchens, or near dishwashing stations. They’re usually hydromechanical, which means they use flow control to separate grease fast.
Modular and Pre-Assembled Systems (Fast and Flexible)
Modular grease trap systems are perfect for businesses that need fast setups or operate in leased spaces. They often come pre-plumbed and ready to drop into place.
If you’re unsure, a licensed plumber or kitchen contractor can guide you through the selection and installation process. Making the right call early on will help you avoid expensive upgrades or fines down the line.
Site Requirements for Grease Trap Installation
Before beginning installation, consider the specific requirements of your facility and local regulations.
Location Considerations
- Indoor Installation: Ideal for small grease traps; easier access for maintenance.
- Outdoor Installation: Common for large GGIs; may require excavation and weather-resistant materials.
Plumbing Integration
The grease trap must be installed downstream of food preparation sinks, dishwashers, and floor drains. Proper slope and ventilation are crucial for functionality and odor control.
Grease Trap Sizing Guidelines
Accurate sizing ensures effective grease capture and compliance with local codes. Sizing typically depends on sink capacity, water usage, and the number of kitchen fixtures.
| Fixture Type | Flow Rate (GPM) | Recommended Trap Size (Gallons) |
|---|---|---|
| Single Sink | 20–30 | 20–40 |
| Three-Compartment Sink | 50–75 | 50–100 |
| Dishwasher | 40–100 | 100–150 |
Check with your local plumbing authority for exact sizing requirements before purchasing.
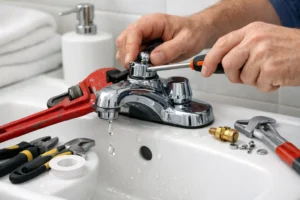
Steps to Grease Trap Installation
Whether installing a small unit under the sink or a large in-ground interceptor, the process requires meticulous planning and execution.
Site Assessment and Planning
Engage a licensed plumber or contractor to evaluate your kitchen layout, water usage, and compliance requirements. They’ll help select an appropriate unit and location.
Permits and Inspections
Obtain necessary building and plumbing permits. You’ll also likely need an inspection post-installation to ensure code compliance.
Installation Process
- Shut Off Water Supply: Ensures a clean and dry workspace.
- Excavation (if needed): For GGIs, dig a trench large enough for the interceptor and plumbing.
- Install Grease Trap: Secure the unit, connect it to the kitchen drainage system, and ensure proper alignment and sealing.
- Connect Outlet Pipe: Leading to the main sewer line.
- Test System: Run water to check for leaks and ensure correct flow.
- Backfill (for GGIs): After successful testing, backfill and secure the cover.
Post-Installation Checks
Ensure odor control, venting, and access points are in place for easy maintenance. Schedule the first clean-out within 30 days to assess accumulation rates.
Maintenance Requirements
Regular maintenance is key to preventing backups and maintaining efficiency.
- Frequency: Every 1 to 3 months depending on kitchen output.
- Method: Manual cleaning, vacuum pumping, or professional service.
- Record-Keeping: Maintain logs of cleaning dates, methods, and disposal records for compliance.
Cost Breakdown for Grease Trap Installation
Installation costs vary depending on unit size, type, and labor requirements. Here’s a general cost overview:
| Component | Estimated Cost (USD) |
|---|---|
| Passive Grease Trap Unit | $250 – $1,000 |
| Hydromechanical Unit | $1,000 – $3,000 |
| Gravity Grease Interceptor | $3,000 – $10,000 |
| Installation Labor | $500 – $5,000+ |
| Permits & Inspection Fees | $100 – $500 |
| Maintenance Setup | $100 – $300 |
Large-scale installations in urban areas may incur higher costs due to excavation and city code requirements.
Is Professional Installation Required?
While it might be tempting to treat grease trap installation as a DIY project to cut costs, most experts and municipalities strongly advise against it. Professional installation ensures compliance with plumbing codes, health department regulations, and manufacturer specifications. Mistakes made during installation—such as improper connections, misaligned vents, or poorly fitted seals—can result in costly repairs and hefty fines.
Why Hiring a Licensed Plumber Matters
Licensed plumbers are familiar with local building codes, can handle permits, and offer workmanship guarantees. They also assess factors like flow rate, pipe slope, venting, and location—all of which influence the efficiency and lifespan of the trap.
Inspection and Approval
Many health departments require an inspection after installation. If not installed correctly, your business may face delays in opening or operational penalties. Hence, professional installation isn’t just advisable—it’s often mandatory.
Why Regular Grease Trap Maintenance Matters
Think of your grease trap as a filter—it collects waste, but when it’s full, it loses effectiveness. Regular maintenance ensures:
- Consistent Performance: Keeps wastewater flowing efficiently.
- Health Code Compliance: Avoids fines and shutdowns.
- Odor Control: Prevents unpleasant smells in your kitchen.
- Longevity: Reduces wear on the trap and surrounding pipes.
Neglecting maintenance leads to blockages, overflows, and even sewer backups. The cost of emergency plumbing and clean-up far exceeds regular service fees.
How Often Should a Grease Trap Be Cleaned?
The frequency of cleaning depends on the size of the trap and the volume of grease your kitchen produces. However, a good rule of thumb is the “25% Rule”: clean the trap when it reaches 25% of its capacity in FOG and solids.
General Guidelines
- High-Volume Kitchens (e.g., fast food): Every 1–2 weeks
- Medium-Volume Kitchens (e.g., casual dining): Every 1–3 months
- Low-Volume Kitchens (e.g., coffee shops): Every 3–6 months
Keeping a maintenance log is often required by local regulators and helps monitor performance trends over time.
Can You Clean a Grease Trap Yourself?
Yes, small under-sink grease traps can be cleaned in-house—if done correctly and safely. However, there are caveats.
DIY Grease Trap Cleaning Steps
- Wear Gloves and Protective Gear: Grease and waste can be hazardous.
- Open the Lid Gently: Use a pry tool and avoid damaging seals.
- Remove FOG and Solids: Use a scoop or vacuum pump.
- Clean Interior Surfaces: Use water and degreaser (non-corrosive).
- Inspect Components: Check for clogs, cracks, and worn gaskets.
- Dispose of Waste Properly: Follow local guidelines for FOG disposal.
Keep Grease in Check, Not in Your Pipes
A well-installed and maintained grease trap protects more than your plumbing—it shields your entire business. Blocked pipes can result in downtime, poor health inspections, and customer complaints. By taking a proactive approach to grease management, you can focus on what truly matters: running a successful, sanitary kitchen.
Proactive Best Practices
- Install sink strainers to reduce solids entering the trap.
- Educate staff about proper grease disposal.
- Use signage reminding employees to scrape plates and cookware.
- Regularly review logs and schedule maintenance proactively.
A grease trap is a quiet hero in your kitchen’s infrastructure. Treat it with the attention it deserves, and it’ll repay you with smooth operations, regulatory peace of mind, and a clean conscience.
Cost-Saving Tips for Grease Trap Installation
While upfront costs can be high, smart choices can help minimize long-term expenses.
- Compare Multiple Quotes: Don’t settle for the first contractor.
- Choose the Right Size: Oversizing wastes money; undersizing leads to fines.
- Use Quality Materials: Prevents costly repairs down the road.
- Routine Maintenance: Saves you from major clean-up and potential code violations.
Common Installation Mistakes to Avoid
Rushing the installation process often leads to improper fittings and ineffective traps. Neglecting routine maintenance can cause grease build-up and system failures. Choosing the wrong size or type of grease trap may result in frequent clogs and costly repairs.
- Ignoring Local Codes: Always check local plumbing and health codes.
- Poor Ventilation: Can lead to unpleasant odors and slow drainage.
- Incorrect Sizing: Causes inefficient FOG capture.
- Inadequate Access: Makes future cleaning a nightmare.
People Also Asked Questions (FAQs)
What is the average cost of grease trap installation?
The cost ranges from $750 for small units to over $10,000 for large in-ground systems, including labor and permits.
How long does it take to install a grease trap?
Installation time varies between 4 hours and 2 days, depending on the size and complexity of the unit.
Are grease traps mandatory for all food businesses?
Yes, in most municipalities. Health departments require them to prevent sewer blockages and environmental harm.
How often should grease traps be cleaned?
Typically every 1 to 3 months, depending on your kitchen’s FOG output.
Can I install a grease trap myself?
It’s strongly recommended to hire a licensed plumber to ensure code compliance and proper installation.
Do grease traps smell bad?
They can, but proper venting, regular cleaning, and sealed lids significantly reduce odors.